
How To Make Polished Concrete Countertops

Table of contents
Overview
How to make polished concrete countertops smooth and shiny. As polished concrete countertops are becoming a big deal in home renovation, and for good reasons. They’re durable, stylish, and super customizable. Whether you’re revamping an old kitchen or building a new one from scratch, concrete countertops might just be what you’re looking for.
I/We promote transparency. This post or site may contain affiliate links. This means only if you make a purchase through these links, not just by clicking, I/we may earn a small commission at no extra cost to you.
As an Amazon Associate, I earn from qualifying purchases
One of the big perks of concrete is its durability. We’re talking about a surface that’s going to stand up to daily wear and tear like a champ. Unlike some other man-made materials, concrete tops won’t easily chip. You won’t find yourself babying it or constantly worrying about damage – it’s tough. This is even more so the case when they are coated with epoxy 2-part epoxy resins,
As for style. polished concrete countertops are sleek and modern, if you want them to be and they can give any kitchen a high-end feel. They can fit right into every design, and they’re versatile enough to work with just about any style. This coupled with the array of materials that can be chosen to make them means you can create whatever you want, something industrial, rustic, or even classic or modern, concrete’s got you covered.
Customising Your Polished Concrete countertops
What really sets Concrete apart is this aspect of customization. When you go the concrete route, you can get really creative. You can add color, embed semi-precious gemstones, glitters or shells, and design many edge details. There’s virtually no limit to what you can do, so your countertops can truly be one-of-a-kind. Especially when top coating with a resin which brings everything to life.
And about the cost. While pre-made polished concrete countertops can run as high as $150 per sqft for high-end. Doing it yourself is a different story. Yes, it’s more work, but it’s definitely easier on the wallet with high-end granites and marbles now reaching $250 a sqft. Plus, the satisfaction of knowing you created it yourself? Priceless.
When comparing polished concrete countertops to other materials, they certainly hold their own. Unlike natural stone, concrete doesn’t have to be sealed often, or if you are using a resin topcoat, then rarely and it’s much more affordable than granite or quartz. Plus, with concrete, the design possibilities are endless, and mimicking granites is not as hard as you think.
Understanding the Two Main Methods: Pour In Place vs. Fabricate Separately
When it comes to making polished concrete countertops smooth and shiny, understanding the methods is key. You’ve got two main options: pour in place and fabricate separately. Choosing the right one can make all the difference in achieving that perfect finish. Each requires various levels of work, and depending on your final finish, some a lot more than others.
Pour in place is a little more straightforward at the onset, but then takes a little more care with pouring, screeding and trowelling. You set up the mold right there on top of your cabinets and pour concrete directly into it. This technique keeps the finished surface facing up, so you need to end up with a nice smooth finish – provided the formwork is precise. But keep in mind, it’s going to require a good bit of attention to detail when setting up the forms and a fair amount of finish work after pouring to get it just right.
On the flip side, the fabricate separately method involves creating the polished concrete countertop mold in a separate workspace. The concrete is poured with the finished face down. Once it’s cured, you flip it over to see the final surface. This method usually offers more control over the finished quality and finer details. But, it does need a large and level workspace, and let’s not forget – you’ll need some muscle to move those hefty slabs into place. Or you might have to incorporate a joint or 2.
Pros And Cons
Each method has its pros and cons. Pour in place is convenient since you’re working right on your cabinets, but you need to ensure the formwork is spot-on. Fabricating separately allows for greater precision and quality control, but it’s physically demanding and requires a suitable workspace.
So, how do you choose? Think about your comfort level, the space you have available, and the look you’re aiming for. If you’ve got the space and strength, fabricating separately might be the way to go for a possible higher-end finish. Otherwise, pour in place could be your best bet. Each has its perks, so weigh them carefully before deciding.
Step-by-Step Guide to Pour-In-Place Polished Concrete Countertops
Pour-in-place polished concrete countertops start right on top of your cabinets, and it’s all about getting the perimeter formwork set up perfectly level by using a laser level is the best way. But first, you must cover all of your cabinets with plywood or OSB, In most instances (similar to marble & granite) these stay in place after you have poured your tops. Seal all gaps with a suitable caulk to avoid any leaks from your concrete pour.
Polished Concrete Countertops & Their Edge Detail
Next comes all your edge details, the more common ones being square, ogee or bullnose. A shaped edge adds class and quality and is always an extra cost with granite. Remember to leave square-edged details at the points where the stove or refrigerator are going, Or where any larder cabinets will be extending above your finished countertop level.
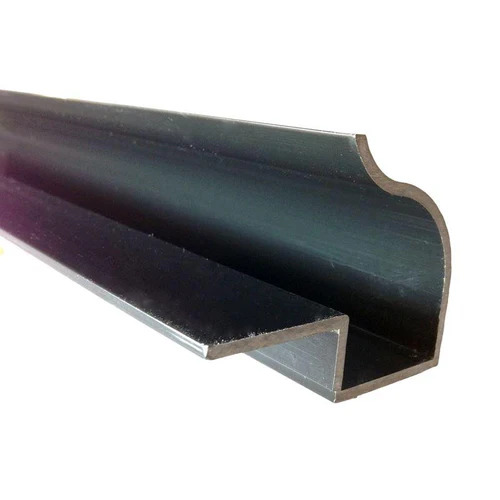
Some of the best products to consider for making your edges are plastic moldings used for wood panelling. There are quadrants and cove profiles which are great for this. Another option is PVC pipe suitable cut to form a bullnose edge. Or there are many beautiful options available online.
Next, you must install any cut-outs for your sink(s), soap dispensers, faucets or other such items. These need to be accurately positioned and fixed in place, if possible to exactly the same level as the finished countertops. This will make it easier to screed off while pouring your concrete.
Make sure everything is sturdy and well-sealed. Seal all your perimeter details in place and seal and edges and corners. When all this is done apply some release agent/spray to your edge detail for easier demolding later.
For Polished Concrete Countertops, You Need to Choose Your Mix
Once all is done, you’re ready for the concrete. Before you start make sure you have all your ingredients to hand, and all your tools too. If you are going to add any special colored aggregates or any other items, broken colored glass etc have them ready.
Making your own mix is a better option for this project. And white cement is best to achieve lighter finished colors. It’s a good practice to make up some samples first in exactly the way you intend to finish your countertops. Mix your concrete to the equivalent of a 3-1 mix, avoid large aggregates, no more than 3/8″, as the total quantities will be fairly small add enough of your special colored or other special effects now, a little extra sand will help with the final finishing. And please don’t forget your concrete fibers, you don’t need a heavy dose with the poured-in-place choice but extra fibers in the poured in the workshop way.
If you are using any semi-precious stones or glitter-type products, hold them back until the concrete is in place. Now place your creamy consistency mix in your formwork. Then tamp and screed it with your straight edge, as level as possible. Make sure you have pushed the mix into any corners as these are prone to voids. Now, before the mix dries too much add your semi-precious stones and glitter or enhancement products. Then trowel over to reinstate the level surface.
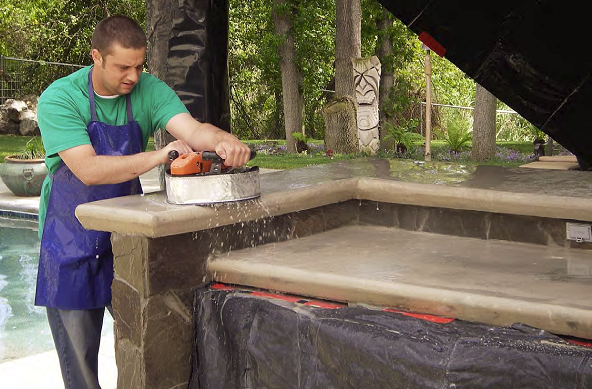
Getting a Great Finish On Your Polished Concrete Countertops
Now wait a while, until the surface starts to set up, then trowel it again. You may have to repeat this process 2-3 times more. Then it’s time to clean up and wait for the curing to complete, overnight should be sufficient for the initial cure.
On the 2nd day after It would be best to strip the edge details to help with curing, another day would not hurt either.
Next comes the final curing process. Concrete needs time to cure properly – don’t rush it. Cover the surface with plastic to keep it moist and allow it to cure slowly, or sprinkle a little water on the whole surface from time to time. This helps prevent cracking and ensures a stronger countertop. Leave it for about a week.
Once the curing is done, it’s time for the finishing. Just like granites and marble, their surfaces need to be polished, this will expose whatever beautiful additives you put in your mix, stones glitter etc. As you will be applying a 2-part epoxy, you don’t have to go to extremes at this point, but be warned it is a messy process. So make sure you cover everything down with plastic.
If you have too much of a fancy edge detail, then it’s not advised to go to strong with any grinding or sanding to avoid losing the detail. A contoured edge should be ok to carefully rub down. Now it’s time to wait until it is all thoroughly dry. Which could be another 3-4 weeks. make sure you protect your work, a coffee or red wine spillage at this time would be a disaster.
Applying The 2 Part Epoxy To Your Polished Concrete Countertops
Now it’s time to apply your 2-part epoxy, clean and vacuum your tops fully, and then follow the manufacturer’s instructions. Again make sure to cover where the resin will inevitably drip a little at the edges. It is possible with extreme care and the thicker product to avoid this. But best to plan for the worst. if you can form a plastic tent to stop any airborne particles from landing in your work.
I am sure as you start to apply your epoxy you will suffer from the wow factor, as the beauty of your work unfolds before your eyes. And then all your hard work seems well worth it.
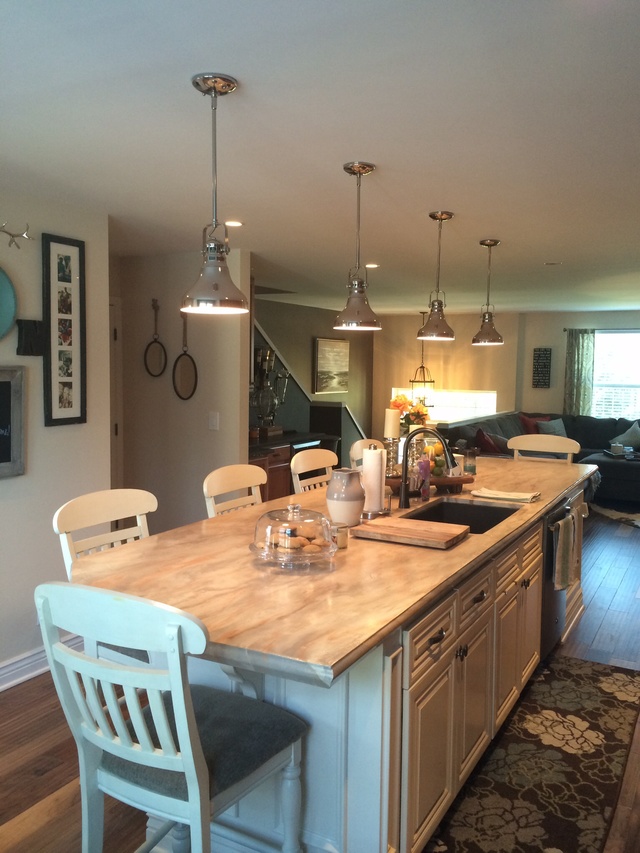
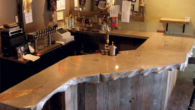
Pour in place takes some effort and attention to detail, but the payoff is worth it. You end up with a smooth, custom countertop that’s built right into your kitchen that fits exactly. With the right steps and a bit of patience, you’ll have those concrete countertops looking sleek and very professional.
Conclusion For Part One
Visualize the end result you want to see. Whether you’re leaning towards a more controlled finish with separate fabrication or the convenience of pour-in-place, think about the final look and feel.
Remember, each method can create a beautiful, durable countertop. Weigh the pros and cons, consider your personal preferences and resources, and go with the method that best suits your needs and vision.
Part 2 of, pour separately in a workshop, to follow this link to the next post.
Contact Us
We hope you find the information useful, but if you have any questions or need help, send us a message. You do have to sign in and confirm these days to comply with government rules. Sorry for the inconvenience.
Author Rob


Leave a Reply