How To Make Resin Trim Pieces With Dried Sand Aggregates
How To Make Resin Trim Pieces With Dried Sand Aggregate

Table of contents
How to make resin trim pieces with dried aggregates. These are the fun pieces in the world of manufacturing and crafts. These small beauties combine resin, a clear or colored synthetic material, with dried aggregates, offering a blend of durability and unmatched aesthetic appeal.
As an Amazon Associate, I earn from qualifying purchases.
This post contains affiliate links. If you make a purchase through these links, I may earn a commission at no extra cost to you
These types of pieces are the way to allow for incredible versatility in design. They can be created with a minimum of material and time. They will be ready to take on any color, shape, or texture you can create. Whether you’re looking to make custom frames, unique borders, or accent pieces, the options are many.
How to make resin trim pieces when incorporating multi-colors as part of your designs. This is the key to making these trim pieces pop. By playing with different hues and mixtures you can create visual effects that bring warmth and character to any piece. Imagine how this splash of color and texture that these trim pieces bring, can add to otherwise plain tiled walls, especially in your bathrooms and kitchens.
These trim pieces can be applied in various ways around the home. Use them to trim out a personalized backsplash in the kitchen, to be made into the framework for beautiful mirrors, or other artwork. Their adaptable nature makes them a fantastic choice for both small DIY projects and larger renovation tasks.
With resin’s strength and the diverse range of aggregate materials available, you’re sure to find the perfect combination that suits your project’s needs. So, whether you’re a seasoned DIY enthusiast or just starting out into the world of home projects, resin and dried small aggregate trim pieces offer a fun, creative way to enhance your living space.
Exploring the Vast Array of Variations
When it comes to resin trim pieces, the sky’s the limit with the variations you can achieve. Whether you’re looking for bold colors or subtle textures, there’s an endless array of combinations to explore.
Customizing these trim pieces isn’t just fun—it’s also a way to put a personal stamp on your home decor. Think of it as creating your own unique puzzle pieces that fit perfectly into your design vision. You can go from bright, vivid colors that catch the eye, to muted, earthy tones for a more understated elegance.
Experimenting with color and texture is where the magic happens. Mix and match different shades of dry pigments with aggregates to see what works best. Sometimes, your best results come from the most unexpected combinations. Don’t be afraid to test out different proportions until you find that perfect balance.
To get some inspiration, look at popular color combinations and textures that are trending. Marble-like patterns and natural stone effects are always a hit. Add a bit of sparkle with metallic pigments or keep it classic with neutral sands. The goal is to create something that not only looks fantastic but also feels right for your space.
The best part? Every piece you create will be one-of-a-kind. No two pours are ever exactly the same, giving you a bespoke aesthetic that’s truly unique. So roll up your sleeves, let your creativity run wild, and start mixing those colors and aggregates to discover your perfect design.
The Benefits of Using Silicone Molds
Silicone molds are the workhorses when it comes to making dried aggregate and resin trim pieces. They offer a range of unbeatable perks that make the whole process smoother and more reliable.
One big advantage is their heat resistance. Resin can heat up quite a bit during the curing process, and silicone handles that heat too like a champ. You won’t have to worry about any warping or melting, which means more precise results every time.
Food-grade silicone is an excellent choice for this task. It’s incredibly durable and can withstand a very high number of uses without breaking down. Plus, it’s super safe to work with, so you don’t have to stress about any unwanted chemical reactions.
Flexibility is another huge plus. Silicone molds are soft and rubbery, making it a breeze to pop out your finished trim pieces without damaging them. The molds return to their original shape after each use, so they’re ready for the next batch without a hitch.
They’re also incredibly easy to use. Just pour your resin mixture in, let it cure, and then gently remove your piece. The mold does most of the hard work, leaving you to enjoy the creative process.
Lastly, silicone molds come in all shapes and sizes. Whether you want intricate designs or simple lines, there’s a good chance that there is a mold out there to match your vision.
But if you’re planning to dive into creating resin trim pieces, investing in quality silicone molds is a smart move. They save time, reduce hassle, and help you achieve professional-looking results with minimal effort.
Crafting Custom Molds for Unique Creations
Creating your own molds is really the best way to go. This opens up a world of possibilities for unique resin trim pieces. Custom molds let your creativity shine and ensure your projects stand out. And most importantly they are your molds. Conduct a little research to see what is already available so you don’t accidentally copy another person’s work. And at the same time check the sizes that are available because that gives you an idea of what size you should be aiming for. Just in case you want to sell them.
Online marketplaces are treasure troves for intricate molding designs in many lengths and widths. These individual pieces could be built into beautiful new work. Start with a flat piece of board that represents the final size of the of the piece you intend to make. Add your linear parts so the pattern will match when another piece is butted up to it. This particular consideration may control the length of your new piece.
The new flat model and new silicone impressions that you make give you far greater flexibility with thicknesses. So after you have finished assembling your model build a box surround that allows you to cover your piece with 3/4″ of silicone. Make sure your model is well sealed in place and at all points of the frame.
Now coat your model with a suitable finishing coat, spray paint etc. Remember the silicone will pick up the exact surface of the model. When you are satisfied with your model remember to coat your surrounding frame with a release agent.
Mix and pour your silicone, and when cured without taking your model and frame apart and you can either pour a 2nd one straight away or store your model safely for the future. Now you can build different height frames to suit the thickness of any material without making numerous molds. And these can be used for many different materials.
You’ve got a mold that can be used for various thicknesses. This is especially handy when working with different tile or marble thicknesses.
The key is creativity. The more imaginative you get with your mold-making process, the more distinctive and sort after your resin trim pieces will become.
Choosing the Right Materials for Your Trim Pieces
Picking the right materials is a vital step in crafting resin and dried small aggregate trim pieces. The materials you select will greatly influence the final outcome, from the look to the durability.
Start with choosing the dry sand material. Play sand is a fantastic option because it’s fine and easy to work with. It’s also readily available, making it a convenient choice for most DIY enthusiasts. Another great resource for smaller quantities is the Colored Sand Company https://www.coloredsandcompany.com They have an incredible range of colors.
Next, let’s talk resin. The type of resin you choose matters. Epoxy resin is popular due to its clarity and strength. Clarity is not a requirement here. Polyurethane resin is another option, bringing flexibility and a quicker curing time to the table. Do a little research and pick what suits your project best. And costs do vary, consider your working and cure times as these can safe time and time is money.
Dry pigments are brilliant for adding color. Experiment with mixing these pigments into the sand before combining everything with the resin. This gives you endless color combinations and a unique, vibrant finish. Liquid colors may be the way if coloring the resin.
Most resins require a release agent even when using silicone molds. Always double-check your resin’s requirements to avoid any unpleasant surprises. Applying a release agent ensures that your finished piece pops right out of the mold without any damage.
Being thorough in this stage saves a lot of hassle later on. The right materials paired with your creative vision will bring your resin trim pieces to life in the most stunning way possible.
The Art of Pouring Resin and Aggregates
Pouring resin and aggregates is where your artistic touch shines. This step involves a bit of technique and a dash of patience, but the results are worth it.
One way is to start by pouring a thin layer of resin into your silicone mold. Doing this first helps anchor the colored aggregates and reduces the chance of any trapped air bubbles. Unless you are looking for a pitted surface finish.
Once the initial layer is down, add your colored sands or other mixed aggregates. It’s best to create a technique for these so that subsequent pieces are similar but different. Sprinkle them in lightly, ensuring an even distribution for a balanced look.
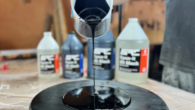
Next, pour another layer of resin to cover the aggregates completely. Depending on you thickness of your piece this might take several layers The final top layer seals everything in place and adds strength to your design. Make sure to spread it evenly to avoid any lumps or uneven spots on the back.
Another technique is to lay just a little resin in your mold and then to mix some of your colored aggregates and resins together and then apply a 2nd thicker coat, followed by a 3rd sealing coat. Now if this is a tile or marble trim piece the installers would appreciate a rougher back surface for keying in the setting materials.
A little trial and error is part of this whole process. Different combinations of resin and aggregates will have varying results, so don’t be discouraged if the first few attempts aren’t perfect. Each pour is a learning experience, and you’ll get better with practice. Resin can change the colors of your sands and aggregates, normally to a darker color.
Understanding curing times is crucial. Some resins cure in minutes, while others can take hours. Follow the resin’s instructions for the best results, and be patient. Not waiting for the full cure can lead to flaws like warping or incomplete hardening. Make notes of all quantities of materials and your resin mixes.
The great thing about working with resin is the flexibility it offers. If something doesn’t turn out the way you wanted, you can try again relatively quickly. This allows for continuous improvement and refinement of your techniques. And once you’ve got it down you can make many pieces in a day.
Pouring resin and aggregates might seem a bit overwhelming at first, but with a steady hand and creative mindset, you’ll soon be crafting beautiful, intricate trim pieces that add a personal touch to any space.
Contact Us
We hope you find the information useful, but if you have any questions or need help, send us a message. You do have to sign in and confirm these days to comply with government rules. Sorry for the inconvenience.
Author Rob


This article is a goldmine for anyone looking to add a unique touch to their home decor with resin and dried small aggregate trim pieces! The versatility these pieces offer in terms of design, color, and texture makes them perfect for a variety of projects, whether you’re sprucing up a bathroom or creating custom frames. I love how the article breaks down the steps clearly, making it accessible for both seasoned DIYers and beginners. The section on customizing your own molds really speaks to the creative freedom this medium allows. Plus, the tips on using silicone molds and choosing the right materials are invaluable for ensuring long-lasting, professional results. Truly inspiring!