
How To Measure Silicone For Mold Making
How to Measure Silicone Quantities for Mold-Making
Table of contents
The rising cost of materials has made knowing how to measure materials and efficient mold-making more important than ever. Silicone rubbers, in particular, have seen a sharp increase in prices, making precise measurements essential to avoid unnecessary waste and expenses. From personal experience, buying liquid silicone can leave a substantial dent in your finances, with a long return on investment if not managed wisely.
As an Amazon Associate, I earn from qualifying purchases.
This post contains affiliate links. If you make a purchase through these links, I may earn a commission at no extra cost to you.

Crafting molds isn’t just about creativity—it’s about precision and planning. You need just the right amount. Too much wastes resources, while too little leaves your project incomplete. Miscalculating silicone quantities can lead to wasted materials, labor costs, and production delays, turning a straightforward task into a costly trial-and-error process.
This guide will walk you through practical methods and tips for measuring silicone effectively. Whether you’re crafting simple flat molds or complex sculptures, the goal is to help you achieve the “just right” balance that saves resources, time, and money. With food-grade silicone costing around $0.65 per cubic inch, even small missteps can quickly add up to hundreds of dollars.
Let’s dive into the key steps to streamline your mold-making process and create successful molds with confidence.
The Importance of Precision in Mold-Making
When creating molds, precision is not just a preference; it’s a necessity. Every drop of silicone costs money, and every miscalculation leads to waste. Beyond cost considerations, how to measure the correct amount of silicone ensures your molds are durable, detailed, and effective. For artists, crafters, and professionals alike, a well-made mold is the foundation of a successful project.
Understanding how to measure silicone accurately also saves time. By eliminating guesswork, you reduce the risk of delays and setbacks, allowing you to focus on the creative aspects of your work. With practice, precision becomes second nature, and you’ll find yourself completing projects more efficiently and confidently.
How To Measure By Understanding Mold Volume Basics
Grasping the concept of mold volume is the cornerstone of efficient mold-making and how to measure. The object you’re molding represents the “positive” space, while the mold cavity is the “negative” space. Calculating these spaces accurately is crucial for determining how to measure how much silicone you’ll need.
For objects with simple shapes, start by measuring the dimensions of the mold box (length × width × height). Subtract the volume of the object from the total mold box volume to calculate the silicone required. For irregular shapes, alternative methods like water displacement or using placeholder materials (e.g., rice or sand) are helpful.
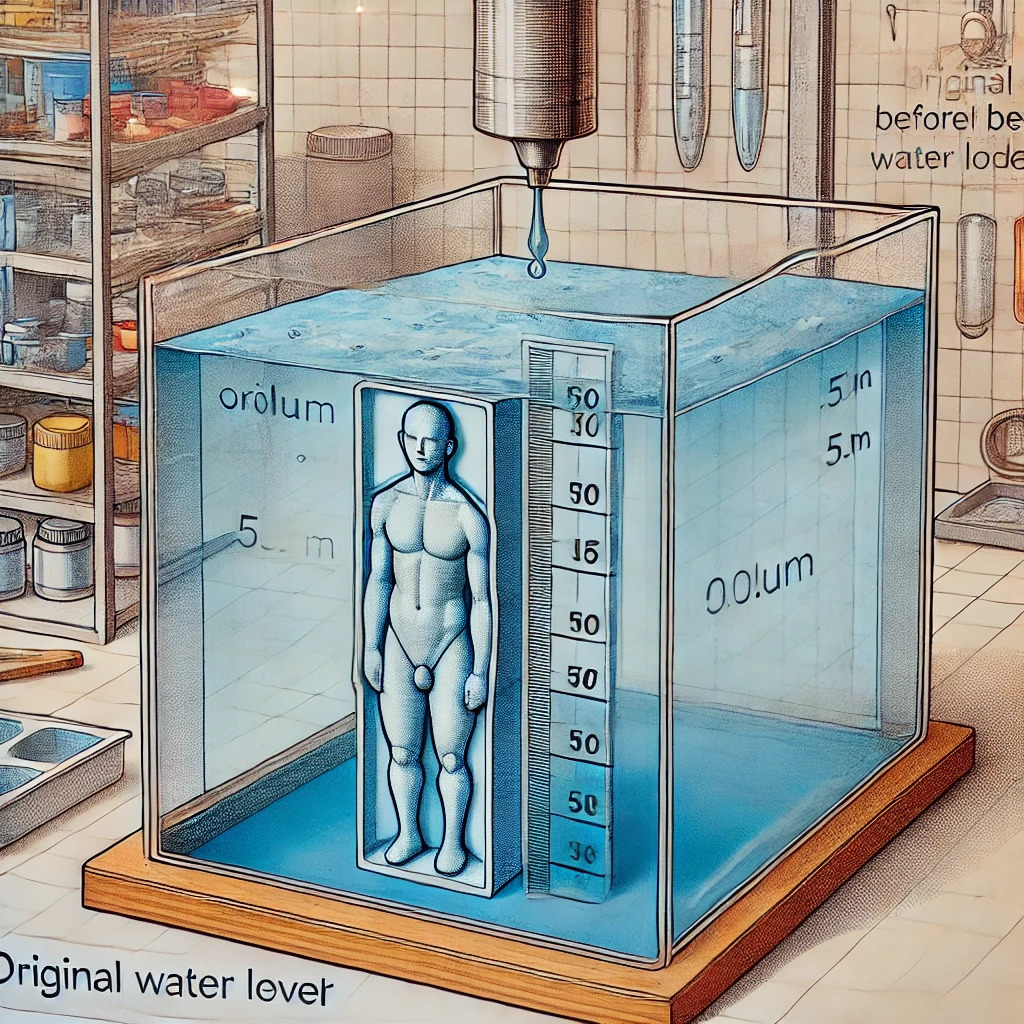
Water Displacement Method
This method involves submerging the object in a container of water and measuring the volume displaced. However, it’s not suitable for objects sensitive to moisture. For such cases, wrapping the object in plastic or using dry filler materials like sand is a safer option. These techniques provide a concrete starting point for your calculations and ensure that your silicone estimation is as accurate as possible.
By mastering these basics, you’ll save time and resources, transforming mold-making into a more streamlined and enjoyable process.
How To Measure Silicone Quantities for Different Mold Types
1. One-Part Molds
Simple flat or shallow molds are the most straightforward to create and require minimal silicone. These molds are ideal for items like tiles, plaques, or flat ornaments.
- How to Measure:
Measure the object’s dimensions and calculate its volume, then adjust for the mold box.
Add 5-10% extra silicone to account for mixing losses and ensure you have enough material. - Tips for Success:
Always ensure the mold box is tightly sealed to prevent silicone leakage during pouring. For very shallow molds, consider using a release agent to make demolding easier.
2. How To Measure Two-Part or Multi-Part Molds
Complex molds, such as those for 3D sculptures or detailed figurines, require more careful planning. These molds consist of two or more parts that join together to encase the object.
- How to Measure:
Divide the total volume into halves, accounting for overlap at the joining edges.
Use placeholder materials (like dry rice or lentils) to estimate the total volume.
Add a 10% buffer to ensure full coverage of all details and undercuts. - Key Considerations:
Two-part molds require a precise alignment system, such as registration keys or grooves, to ensure the parts fit together perfectly. Pay special attention to areas with fine details, as these can trap air pockets.
3. Thin-Layer Molds (Brush-On Technique)
Thin-layer molds are ideal for capturing fine details on intricate objects like busts, statues, or animal figures. This method involves applying silicone in layers, building up thickness gradually.
- How to Measure:
Calculate the object’s surface area. For irregular shapes, wrap the object in lightweight plastic wrap, flatten it, and measure the area. Alternatively, use online tools to estimate the surface area of 3D objects.
Multiply the surface area by the desired thickness of silicone layers (usually 5-10 mm total).
Example: A 1,500 cm² surface area with 8 mm thickness requires 1,200 cm³ of silicone.
Add 10-15% extra to account for material lost during application. - Application Process:
- Apply a thin detail layer to capture textures.
- Add thicker build-up layers for durability.
- Allow each layer to cure partially before applying the next.
- Create a rigid support shell (e.g., fiberglass or plaster) to maintain the mold’s shape during casting.
Practical Tips for Accurate Silicone Measurements
- Use Digital Scales: Precise measurements are crucial, especially for two-part systems. An incorrect mix ratio can compromise the curing process.
- Practice with Small Batches: Experimenting with small quantities helps you understand how silicone behaves and builds confidence for larger projects.
- Employ Thixotropic Additives: These additives make silicone thicker and easier to control, especially for vertical or detailed surfaces.
- Inspect Each Layer: For thin-layer molds, check for air bubbles and thin spots after each application. Use tools to press silicone into intricate details.
- Plan for Waste: Add a 10-15% buffer to your calculated volume to account for shrinkage, spillage, and mixing losses.
Measuring Silicone with Dummy Fill Materials
Using materials like dry rice, lentils, or sand is a practical way to estimate silicone volume. Simply fill the mold cavity with your chosen material, then transfer it to a measuring container. This method provides a tangible reference, reducing guesswork and ensuring accuracy. While this approach takes a bit of patience, and sometimes a lot of clean-up, it’s highly effective for avoiding shortfalls and overspending.
How To Measure and Crafting The Perfect Molds with Confidence
Efficient mold-making is about more than just creativity—it’s about precision, planning, and resource management. By mastering these techniques, you’ll not only save time and money but also produce molds that meet your highest standards.
Whether you’re working on a simple flat mold or an intricate sculpture, the strategies outlined here will help you tackle any project with confidence. Equipped with these insights, you’re ready to take your mold-making skills to the next level and turn your creative visions into reality.
Contact Us
We hope you find the information useful, but if you have any questions or need help, send us a message. You do have to sign in and confirm these days to comply with government rules. Sorry for the inconvenience.
Author Rob


Hi Rob,
I just finished reading your article, “How to Measure Silicone for Mold-Making,” and I think you did an excellent job breaking down the complexities of silicone measurement. Your emphasis on precision and resource management stands out, especially given the rising costs of materials. The sections on mould volume basics and the different methods, like water displacement and dummy fill materials, are particularly practical. I also appreciated how you tailored advice for specific mould types, which makes the guide accessible to a wide range of creators.
I was curious, though, how do you handle highly irregular shapes where traditional methods like water displacement or filler materials might not work effectively? Have you encountered such challenges in your projects?
Eric
Hi Eric,
Thanks for your comments. And in answer to your question, displacement is the ultimate way for any awkward-shaped model.
Rob
Hey Rob –
Making silicone molds is fun, challenging, and rewarding. You have provided sound tips and tricks to reduce waste, like using dry ice, sand, or lentils. Well done. You mention that food-grade silicone costs $0.65 per cubic inch. Would it be beneficial to add a cost comparison for different types of silicone to help readers choose based on their budget?
Hi Godwin,
Thank you for your comments, and in the article there is a link to another post with prices of all normal rubbers for mold making.
Thanks,
Rob