
Resin Casting And Innovative Techniques For Adding Color And Texture.
Resin Casting and Innovative Techniques for Adding Color and Texture
Resin casting is a versatile art form that allows creators to produce stunning, durable, and highly detailed pieces. While clear or solid-colored casts can be beautiful, adding innovative color and texture techniques can take your resin creations to a whole new level. Whether you’re crafting or casting resin jewelry, sculptures, or decorative household items, experimenting with different methods can create unique visual effects and enhance depth and character in your work.
As an Amazon Associate, I earn from qualifying purchases.
This post contains affiliate links. If you make a purchase through these links, I may earn a commission at no extra cost to you.
In this article, we’ll explore some creative ways to incorporate color and texture into your resin casts. New tricks and techniques are always surfacing, so stop back from time to time to see what’s new—or even sign up to be informed when fresh content is available.

Why Enhance a Resin Casting with Color and Texture?
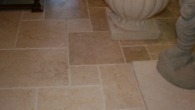
Adding texture and color to resin opens up limitless artistic possibilities. Not only does it enhance the aesthetic appeal, but it also allows for detailed personalization and branding, such as introducing initials or a single-letter monogram. A textured resin casting can mimic natural materials such as wood, marble, or stone—even gemstones—while color variations introduce vibrancy and dimension. This makes resin an excellent medium for artists, crafters, and even businesses looking to create standout products.
Moreover, using color and texture can increase the value of resin pieces, making them more attractive to potential buyers or clients. Unique finishes and intricate textures set your work apart from mass-produced alternatives, helping you carve out a niche in the growing resin art industry.
1. Pigment Powders for Vibrant Color Effects
Pigment powders, including mica powders, metallics, and chameleon pigments, are an excellent way to add depth, shimmer, and a pearlescent glow to resin. These powders can be mixed into the resin for an even color or dusted onto the mold before pouring to create a surface effect that highlights intricate details.
Pigment powders are particularly effective for creating multi-dimensional color shifts that react to different lighting conditions. Some of the best pigment powder types for resin include:
- Mica Powder – Provides a subtle shimmer and soft glow effect.
- Chameleon Pigments – Color-shifting powders that change hues depending on the viewing angle.
- Metallic Pigments – Add a bold, shiny finish, great for industrial or steampunk-style pieces.
Tip: For a metallic or holographic sheen, layer different colors of pigment powder in the mold before pouring resin. This can also be done in layers, creating even more variations in the piece.
2. Chameleon Flakes for Iridescent Effects
Chameleon flakes are another exciting way to create stunning color-shifting effects in resin. These flakes come in various sizes and can be sprinkled into the resin or applied to the mold before pouring. The result is a mesmerizing display of colors that change based on the viewing angle, similar to the effects found in natural gemstones like opals.
Best Uses for Chameleon Flakes:
- Jewelry pieces for a multi-dimensional shimmer.
- Decorative coasters and trays to create an ethereal glow.
- Accents in geode-style resin art for a realistic crystalline appearance.
Tip: Applying a black or dark base underneath chameleon flakes can intensify their iridescence, making the colors pop even more. This is often achieved by flipping the piece over after curing and applying a background layer to the back.
3. Creating Crinkled Textures with Plastic and Mica Powders
A unique way to add texture and dimension to resin pieces is by using crinkled plastic sheets. By placing a piece of plastic (such as cellophane, plastic wrap, or even a textured plastic bag) over or under the resin, you can create organic, crinkled textures that resemble crushed glass, natural stone, or frosted surfaces.
How to Use This Technique:
- Pour some resin into your mold, then place the plastic on the wet resin. Move it around with tweezers to create a random effect.
- Allow the resin to cure until it is nearly set, then remove the plastic.
- Dust the textured surface with mica or chameleon powders/flakes to highlight the raised areas.
- Pour a second clear or lightly tinted resin layer to seal in the effect.
- If your piece is deep enough, you can layer this technique for added complexity.
Why This Works:
- Enhances visual depth by creating contrast between smooth resin and textured areas.
- Mimics natural textures that are found in minerals, ice, or abstract art.
- Customizable by using different plastic materials and powder colors.
Tip: Experiment with different mica powder colors for a layered, high-contrast look. Gold or silver mica over a dark background creates a stunning aged-metal effect!
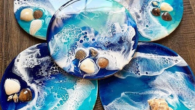
4. Resin Casting and Layering With 3D Effects
By pouring resin in layers, you can build up depth and create floating effects. This technique is excellent for making:
- Ocean or water-inspired pieces with layered blue tones.
- Galaxy or cosmic themes using pigments, glow powders, and metallic flecks.
- Encapsulated 3D objects, such as miniatures or beads, so appearing to float within the piece.
Pro Tip: Allow each layer to partially cure before adding the next to avoid unwanted blending while still ensuring adhesion.
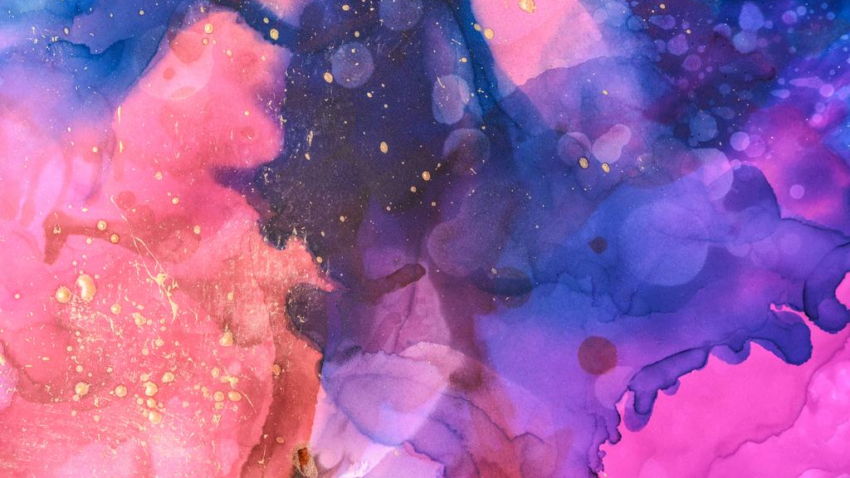
5. Using Alcohol Inks for Mesmerizing Effects
Alcohol inks are a popular choice for adding vibrant colors and unique patterns to UV and epoxy resins. These inks disperse and blend beautifully while the resin is still uncured, allowing for a range of creative possibilities.
Techniques to Try:
- Marbling: Drop alcohol inks into the resin and swirl them with a toothpick or stick to create a marbled effect.
- Petri Dish: Layer different colors of alcohol inks in the resin, creating a mesmerizing organic pattern.
- Ombre: Blend multiple shades of alcohol inks to create a smooth gradient effect.
- Geode: Mimic the appearance of natural geodes by combining alcohol inks with glitter and metallic pigments.
- Other Patterns: Experiment with various tools to pull, blend, and shape the inks into unique designs.

Final Thoughts on Resin Casting
Experimenting with different coloring and texturing techniques in resin casting can lead to one-of-a-kind results. Whether you prefer bold and dramatic effects or subtle and organic designs, these methods will help you push the boundaries of your creativity. The key is to test different materials, play with layering, and embrace imperfections—often, the most beautiful resin pieces come from happy accidents!
Bonus Tip: Sealing and Finishing for Maximum Impact.
Once you’ve mastered color and texture techniques, it’s important to seal and polish your resin pieces properly. Consider:
- Using a high-gloss resin topcoat for extra shine and durability.
- Doming resin to enhance surface shape.
- Buffing and polishing the surface to create a glass-like finish.
- Applying UV-resistant coatings to prevent fading over time.
What’s Your Favorite Technique in Resin Casting?
Which of these techniques have you tried? Do you have a favorite method for adding color and texture to resin? Or do you have other methods you’d like to share?
Let us know about your experiences by contacting us! And be sure to sign up to be notified about the launch of our YouTube channel, where we’ll cover these and many other aspects of resin and craft techniques.
Contact Us
We hope you found this information on resin casting helpful! If you have any questions or need assistance, feel free to reach out. Please note that due to government regulations, you’ll need to sign in and confirm your message. We apologize for any inconvenience.
Author: Rob
Ps. This is the company that taught me how to build this site and 3 others in 6 months, they keep their promises.


Resin casting is such a versatile and exciting art form, offering endless opportunities to experiment with different textures, pigments, and techniques to create truly unique pieces. One of my favorite methods involves incorporating mica powders, which add a gorgeous, iridescent shimmer that enhances the depth and vibrancy of jewelry designs. I’ve also been experimenting with layering chameleon pigments, and the way they shift colors under different lighting conditions is absolutely mesmerizing—it gives the piece an almost magical quality! The crinkled plastic technique sounds incredibly intriguing, and I can’t wait to try it out on my next pour. I love discovering new ways to push the boundaries of resin art, so thank you for the creative inspiration!
Hi Herman,
Thank you for your constructive comments and I am happy that you got inspiration from the post.
Rob
Hello Rob!
This was a really insightful read! I’ve been experimenting with resin casting for a while now, and playing with different pigments and textures has been such a rewarding process. I’ve found that mica powders give a beautiful shimmer, and I love my chameleon ones that change color depending on how the light hits it.
Have you worked with natural additives like dried flowers or wood shavings? I’d love to hear your thoughts on achieving consistency when mixing colors—sometimes, I struggle with getting the exact shade I envision. Any tips for better control over the final look?
Angela M 🙂
Hi Angela,
Thanks for your great comments, and I am happy to hear that you have been experimenting with additives, you really can create some unique effects. I have used many natural products with resins in my career. And from small to large pieces.
Rob