
How To Use Liquid Silicone Rubber for Mold Making

Table of contents
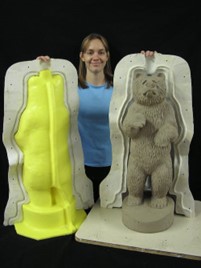
Today’s way of making intricate molds.
Today, I’m going to be talking about how to use liquid silicone rubber for mold making & other supplies. At its core, mold making is an art form, a technique used to reproduce objects with incredible accuracy. Making it crucial in a variety of industries from jewellery to automotive parts.
However, I would like to go through the reasons it’s used in the wet cast stone industry. I have used many types of liquid rubbers in that career. In this article, I will concentrate on silicones.
I/We promote transparency This post or site may contain affiliate links. Which means only if you make a purchase through these links, not just by clicking, I/we may earn a small commission at no extra cost to you.
As an Amazon Associate, I earn from qualifying purchases
Which 2 Part Liquid Rubber
You’re going to find out about the two main contenders in this space: Liquid Silicone Rubber and Liquid RTV rubber. Both have their place in the world of replicas. But as we’ll explore, silicone often takes the crown for reasons that span from practicality to performance.
Varieties
And there are many varieties of each of these products, some are just better for a certain project. If you are unsure just ask and we will respond.
Which Variety Of Silicone.
It’s not only how to use liquid silicone for mold making, its the choice to opt for silicone. It’s reflective of the specific needs of a project. You need to consider several factors. The number of pieces you intend to produce,
- Will there be other future orders for this piece.
- The intricacy of the original piece.
- The type of materials you will be casting with.
- How quick is the mold needed.
These are the very factors that play into the decision to choose one material over the other.
Silicone Rubbers Properties
What’s fascinating about silicone rubber is its unique properties. It’s got a reputation for being extremely flexible, durable, and resistant to extreme temperatures. Which, trust me, can make a world of difference in your mold-making ventures. The latter benefit you are probably thinking doesn’t apply to wet cast stone production. But I can assure you it does.
There’s a lot of opportunity in using silicone. Here the intent is to guide you through why it’s a smart choice for both beginners and seasoned professionals alike.
Choosing the Right Material for Your Mold
When you’re new to the world of mold making, the array of materials that are on offer can overwhelming. Many have no idea which 2-part liquid rubber is best for their project or application.
You might be wondering why one would choose silicone rubber over other types of RTV rubbers. It boils down to several considerations that you need to weigh before spending a dime.
Numbers For Production, Now And Future.
First up, let’s talk about the role of quantity. Think about the number of pieces you intend to create. If you’re aiming for a large run, silicone rubber can be incredibly resilient, often allowing for more casts. And faster and easier turnaround time between pours. And with just a little care and maintenance the mould will give you longevity before the mold starts to degrade.
On the other hand, if you’re only making a handful of items. You might opt for a less durable and more cost-effective RTV option.
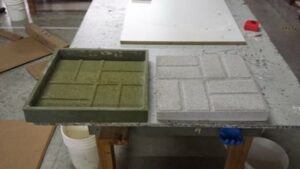
Complexity Of The Piece To be Copied And Produced
Now, what about the complexity of your design? Silicone rubber comes out on top due to its flexibility and strength. It can easily replicate intricate details as it “pulls” well when de-moulding, without breaking or tearing apart. Which is absolutely crucial when you’re replicating and manufacturing objects with fine or complex features. Again items with less detail might be better suited with an RTV rubber.
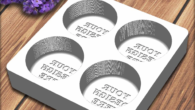
How To Use Liquid Silicone Rubber Molds For Making PIeces.
The intended end product also comes into play. If you’re working with food-grade items, for example, you’ll need a silicone that’s safe for food contact. Similarly, if the final product needs to withstand high temperatures, silicone’s heat-resistant properties make it an unbeatable choice.
Why Silicone?
Let’s delve into the specifics of what makes silicone rubber stand out. Its properties mentioned above are quite impressive. But also other features such as no need for a release agent. Because in most cases silicone maintains its own in it’s composition. You can feel a silky-like touch on the surface of the moulds.
Another important point is that for beginners especially. It should be noted CS25 silicone, which is a condensation cure product does not need degassing. This avoids additional costs of equipment, time and other processes in its usage. Degassing is more common in the RTV rubber range of products and many types of resins. Especially casting resins, where a totally glass-like appearance is required.
I will cover the degassing process in a future article. Possibly in one for RTV rubbers where its use is more common, and hopefully remember to include a link here.

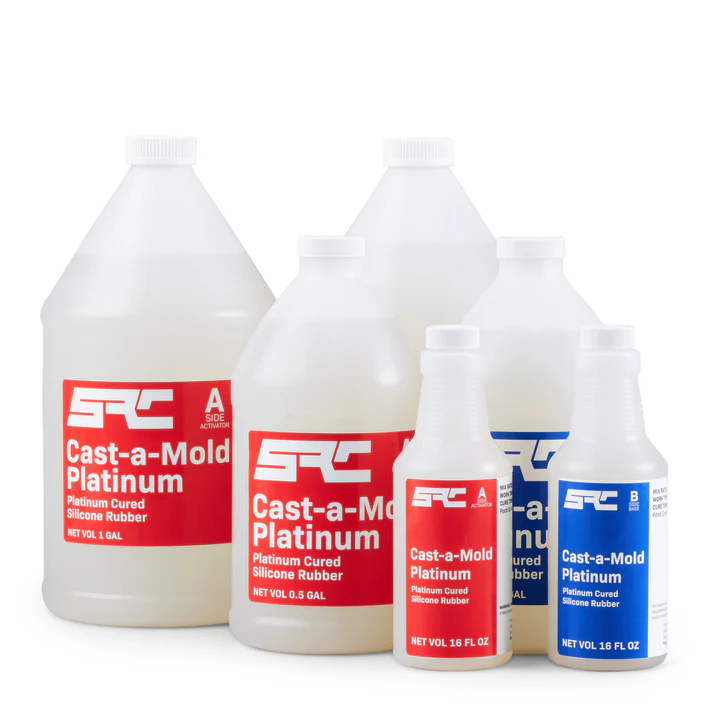
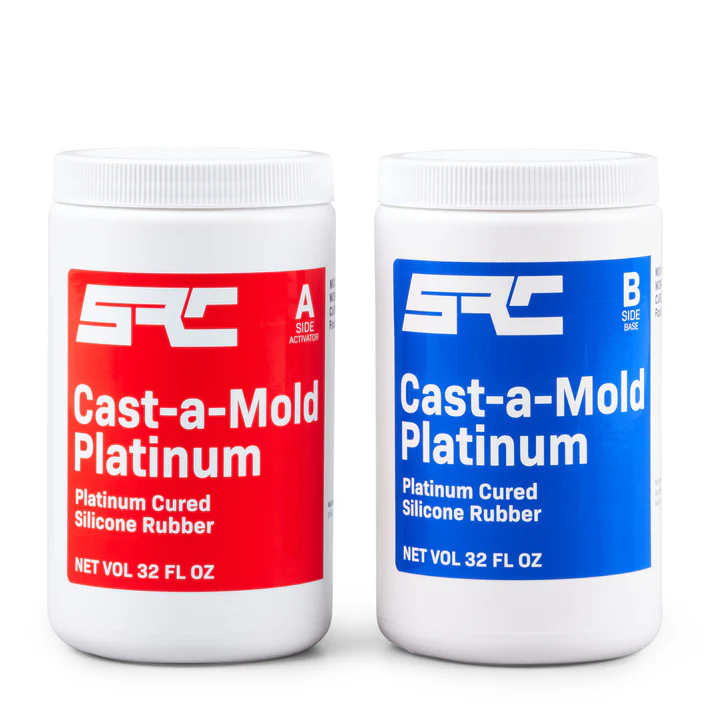
2-Part Silicone Rubbers And Costing.
Comparing costs, silicone rubbers can be far more expensive than other liquid rubbers and as this is an upfront cost. So it doesn’t fit all budgets. However, their durability often means you’ll get more use out of a single mold, and less costs in production. Both in labor and material savings, and ongoing mold maintenance.
This can offset the initial investment in the long run. It is worth designing a spreadsheet for this cost evaluation. If you do opt for silicone don’t forget to add a cost factor of the storage of the mold itself. And any original model or prototype that it was made from. I used to have over 8,000 SQFT dedicated to mould storage. so it does mount up over time
All these factors combined portray silicone rubber as a versatile powerhouse in the mold-making universe. Its ability to capture detail and endure repeated use without compromising the quality of the pieces it casts makes it a favourite.
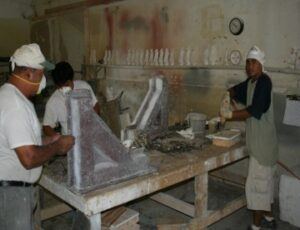
Tools and Supplies: How To Use Liquid Silicone For Mold Making
Here lets take you through the essentials you need to begin your mold-making adventure. But remember, you can always adjust your approach and tool kit down the road as you gain more experience.
The pillar of mold-making is undoubtedly the mold-making material itself. Yet, to bring your creation to life, there’s a suite of tools and accessories that’s best to gather around you. It’s also about the ancillaries that make the process a lot easier and smoother.
Quantity Needed
I will list them in order. It may be easier to follow and think about the process in more depth that way. The first is the silicone rubber itself. You really need to work out the quantity for your current project, and any on the immediate horizon. It is an expensive product. Even though it has a 6-month shelf life before it starts to degrade. That’s if you follow the individual manufacturer’s storage recommendations.
Depending on what type of mold you intend to pour. The computations to work to the volume of product can be a task unto itself. We could go into masses of formulas and cheat sheet methods. But basic common sense and a few measurements will be ample for most projects. If you have modelled your piece in clay. Then the weight of the clay used is pretty close to the Lbs of silicone you will need. I have filled molds with dry play sand first to get close to the same results. Just a little more clean up required after doing this.
Budget Constraints
Then any budget requirements you have, but the more you buy the cheaper the product. But its no good sitting there not being utilized.
Batching & mixing.
Next, you will need an accurate set of weigh scales with a range big enough for a good size mix. A good stock of 5-gallon paint buckets that are great for mixing in. Many smaller containers are advised for smaller projects or where you want to mix smaller batches.

Weighing
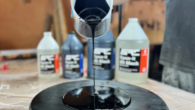
Please remember silicone rubber and most other 2 part products are mixed by weight ratios not volume! Release agents like a mold-release wax to coat the insides of all your mixing buckets. It then makes clean-up much easier as it prevents sticking to their surfaces. Use it on other items like your outer mold frame or shell. A medium size mixing drill and a couple of whisks. These should be suitable for the mixing drill and the size of your mixing buckets is a must. Make sure you get the right whisk for the job. As you don’t want to introduce any air into the mix.
Leaking.
A suitable caulk that you can use to seal and stick your model to an appropriate base. This eliminates rubber leakage under the model. Use the same caulk to seal any framework, shell mold holes or joints that surround your model or prototype. If you don’t seal the tiniest of holes you will get leakage. As this product is just a little thicker than water. And just when you thought it was a job well done. You turn around to see a puddle of silicone on the floor or all over your workbench.
Its not just the frustration or the loss of a very expensive product it’s just not a nice outcome. Spend a little more time checking things over for possible leakage spots. I recommend having a block of modelling clay to hand when pouring to dam up anything you might have missed. So now you are ready to mix, but let’s cover a few more points that may need your attention.
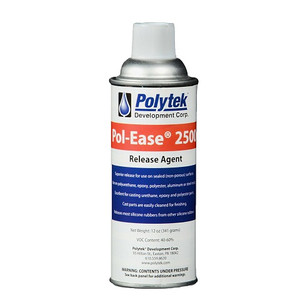
Release agent.
The model should be clean and precoated if it is a porous material, or you want a finer finish. Then coated with the appropriate release agent including the shell or surround framework. If it is a framework-style outer mold is it set up nice and level? An unlevel back to your mould, when the silicone is poured, will have a knock-on effect. When you de-mould and turn the mould over for production.
Production
A nice and level poured mold means the pieces will then be produced level. Sometimes additional work is required on the mold before it can go into production. It may need a surrounding frame to increase the thickness of the piece is one such task. All of these points are pivotal to the endeavour, ensuring your molds and production pieces come out without defects.
Safety Precautions.
To take the proper safety precautions throughout this entire process is a must for all concerned. Your basic items like disposable gloves, an apron and goggles are a must. Adequate ventilation for most products are needed, but so is a good temperature from storage to pouring to curing. Crafting moulds and the use of silicone rubber should be fulfilling, not harmful.
With your workspace prepared and safety gear at the ready, you’re set to transition seamlessly into the actual mold-making process. Take your time to familiarize yourself with each tool. Knowing them like the back of your hand will pay dividends later.
Casting a Successful Mold: The Wrap-Up
Let’s go through the conclusion of this mold-making adventure. Painting a clear picture of the final steps and considerations to ensure your project is a success. Remember, your first attempt not be perfect or your last, but getting a good head start is crucial.
Once you’ve chosen the perfect silicone rubber for your project and have all the necessary tools at hand. It’s time to start meticulously reading and following the manufacturer’s guidelines for the mixing and curing processes. Some may vary, depend what and where you bought it. Precision is key here, as inaccurate weights or uneven mixing can lead to disappointing results.

The Working Environment
From there, pay close attention to the curing environment. Temperature, but not normally humidity can affect the curing time and the final properties of your mold. So you’ll want to keep conditions as stable as possible. Most silicones prefer a temperature of between 70-80 F (21 -27 C), this includes storage. Outside of these ranges can still work. But some, then all of the 4 points could kick in the father away from the optimum temprature you are.
- Slower cure. The curing time will be extended, lower longer!
- Increased viscosity. The mixed silicone product. Too thick it’s more difficult to pour & it might not pick up all the finer details from the model.
- Air entrapment. Air entrapment (gassing) is rare when within the ranges. more air bubble affects the quality of the piece.
- Incomplete curing: Extremely low temperatures can prevent final curing resulting in a weaker or useless mould.
Always contact the manufacturer or supplier for full details. As the same type of products from different manufacturers can have different requirements. And take the time to go through them, most you can read up on them online these days.
Liquid Silicone Rubber For Mold Making and Their Care.
This isn’t just about the initial casting; it’s also about the long game. Maintenance of your silicone molds is straightforward. Clean them gently with soap and water, the occasional spraying with a silicone spray. And store them away from direct sunlight and extreme temperatures to extend their lifespan.
Keep in mind that the more complex the mold, the more practice and patience you’ll need. However, the versatility, durability, and quality finish provided by silicone rubber make it well worth the effort. Making a cast stone piece that requires this process and that pleases your customer is very rewarding. After all, every master was once a beginner, and with silicone mold making, the opportunities for creativity are endless.

Conclusion
We hope that you’ve found this guide insightful and that it helps you embark on your molding journey with confidence. I’d love to hear about your experiences and see what amazing projects you have created. Your feedback not only contributes to my knowledge it can be used in future articles or posts to help others.
We hope you find the information useful, but if you have any questions or need help, send us a message. You do have to sign in and confirm these days to comply with government rules. Sorry for the inconvenience.
Author Rob


wow this was a very informative post I learned stuff I did not know about silicone molds. I know there are alot of people out there do alot more with silicone molds these days. I did not know that you had to seal a mold as well. Learn something new everyday. That there are different kinds of rubber.
Thank you for your feedback, we are glad that you have learned a little more about the product and method.